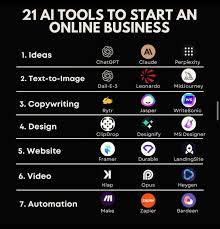
Design software has changed a lot in the last couple of years. Tasks that used to take hours — removing a background, generating variations of a logo, resizing a poster for ten different platforms — now take minutes with the right tool. If you’re a graphic designer trying to keep up with client deadlines or just trying to work smarter, this guide breaks down which tools are genuinely useful in 2026 and where they still fall short.
This isn’t a list of every tool with a shiny landing page. It’s a practical look at what helps designers do real work faster, along with the honest downsides of each category.
Artificial intelligence is transforming the way graphic designers work, making it easier than ever to create professional-quality visuals in less time. From generating unique artwork and editing photos to designing logos, social media graphics, and marketing materials, AI-powered tools are helping both beginners and experienced designers boost their creativity and productivity.
In 2026, AI design tools have become smarter, faster, and more accessible. Many platforms can generate images from text prompts, remove backgrounds with a single click, enhance photos, create brand assets, suggest color palettes, and even produce complete design layouts in minutes. These features allow designers to spend less time on repetitive tasks and more time refining creative ideas.
Whether you’re a freelance graphic designer, digital marketer, content creator, small business owner, or design student, the right AI tool can streamline your workflow and improve the quality of your projects. Some platforms focus on image generation, while others specialize in branding, vector illustration, presentation design, or photo editing.
In this guide, we’ll explore the best AI tools for graphic designers in 2026, compare their key features, pricing, advantages, and limitations, and help you choose the right solution for your creative needs. Whether you’re looking for a free AI design tool or a professional platform with advanced capabilities, you’ll find options that can save time, inspire creativity, and elevate your design work.
Why Designers Are Adopting These Tools Now
A few years ago, most of these tools felt like gimmicks — fun to try, not reliable enough for client work. That’s changed. Agencies now use generative image tools for early concept mockups. Freelancers use background removal and upscaling tools to cut hours off repetitive tasks. Even in-house design teams are using smart resizing tools to adapt one design across dozens of ad formats without redoing the layout each time.
The shift isn’t about replacing design skill. It’s about cutting down the boring, repetitive parts of the job so designers can spend more time on the creative decisions that actually matter.
Categories of Tools Every Designer Should Know About
1. Image Generation and Concept Tools
These tools turn a text description into a visual — useful for early-stage mood boards, quick concept art, or generating reference images when a stock photo doesn’t quite match the brief.
Image generation and concept tools are among the most powerful AI solutions available for graphic designers in 2026. These tools use artificial intelligence to transform text prompts into original images, illustrations, concept art, product mockups, and creative visual ideas within seconds. They help designers quickly explore multiple concepts before investing time in detailed editing and final production.
AI image generators are especially useful during the brainstorming stage of a project. Instead of starting with a blank canvas, designers can describe a scene, style, color palette, or design concept in natural language, and the AI produces several unique variations. This speeds up the creative process and provides fresh inspiration for branding, advertising, social media, packaging, website design, and digital artwork.
Many modern AI image tools also include advanced features such as image editing, background replacement, object removal, style transfer, image expansion, and high-resolution upscaling. Some platforms allow users to upload reference images, maintain consistent visual styles, or generate multiple design variations for client presentations, making revisions faster and more efficient.

While these tools significantly improve productivity, they work best when combined with traditional design software. Professional designers often use AI-generated concepts as a starting point and then refine them with manual editing to match brand guidelines, improve composition, and ensure a polished final result. This combination of AI assistance and human creativity delivers the highest-quality designs.
When choosing an AI image generation tool in 2026, look for features such as high-quality image output, customizable art styles, fast rendering, commercial usage rights, easy editing options, and seamless integration with your existing design workflow. The right tool can help you generate creative ideas more quickly, reduce production time, and bring innovative design concepts to life with greater efficiency.
Example use case: A designer working on a fantasy book cover types out a description of the scene and gets several visual directions in minutes, instead of spending an hour scrolling stock sites for something close enough.
Pros:
- Speeds up the brainstorming and mood-boarding phase
- Useful for pitching multiple visual directions to a client quickly
- Good for generating textures, backgrounds, and abstract elements
Cons:
- Output often needs manual cleanup or isn’t print-ready
- Copyright and ownership questions can get murky depending on the tool and how the image is used commercially
- Not a replacement for custom illustration when a client needs something truly original
2. Background Removal and Object Editing
These tools automatically detect the subject in an image and remove or replace the background, saving what used to be tedious manual masking work.
Background removal and object editing tools have become essential for graphic designers in 2026. Powered by artificial intelligence, these tools can automatically detect the main subject in an image, remove or replace the background, erase unwanted objects, and make precise edits in just a few clicks. Tasks that once required advanced photo-editing skills and significant time can now be completed quickly and accurately.
AI-powered background removal is especially useful for product photography, e-commerce listings, marketing materials, social media graphics, and professional portraits. Designers can instantly create transparent backgrounds, place subjects into new scenes, or apply branded backgrounds without spending time making manual selections. This helps maintain a clean, consistent look across different design projects.
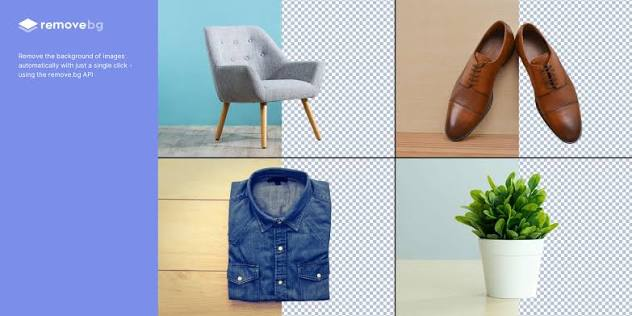
Object editing features go beyond simple background removal. Modern AI tools allow designers to remove distractions, replace objects, expand image borders, fill empty areas with matching content, and edit specific parts of an image using text prompts. These capabilities make it easier to create polished visuals while reducing the need for complex manual retouching.
Many AI editing platforms also include smart features such as automatic shadow generation, color correction, image enhancement, noise reduction, and high-resolution upscaling. These tools help improve image quality and ensure that designs look professional across websites, print materials, advertisements, and social media platforms.
When selecting a background removal and object editing tool in 2026, consider factors such as editing accuracy, processing speed, support for high-resolution images, batch editing capabilities, and compatibility with popular design software. A reliable AI-powered editor can save hours of work, improve consistency, and allow graphic designers to focus more on creativity and less on repetitive editing tasks.
Example use case: An e-commerce designer needs 200 product photos with clean white backgrounds by end of day. Instead of manually masking each one in an editing program, a batch background remover handles most of them in a single pass, leaving only a few tricky edge cases to fix by hand.
Pros:
- Massive time saver for bulk product photography
- Handles complex edges like hair or fur reasonably well now
- Many tools offer batch processing for large projects
Cons:
- Struggles with very fine detail or transparent objects like glass
- Free versions often add a watermark or limit resolution
- Still needs a quick manual check for client-facing work
3. Upscaling and Image Enhancement
These take a low-resolution image and enlarge it while trying to preserve sharpness, which is handy when a client sends a small logo file that needs to go on a billboard.
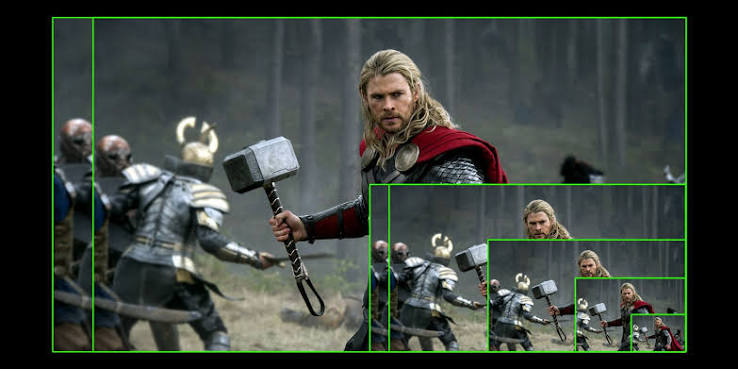
Example use case: A client provides an old, pixelated version of their logo because the original file is lost. An upscaling tool cleans it up enough to use in a new print campaign without the designer having to redraw it from scratch.
Pros:
- Rescues old or low-quality assets that would otherwise be unusable
- Faster than manually redrawing or vectorizing an image
- Useful across both photography and vector-style graphics
Cons:
- Results vary a lot depending on how degraded the original image is
- Can introduce odd artifacts on complex textures
- Not a substitute for having the original high-res or vector file
4. Layout and Auto-Resize Tools
These take one design and automatically adjust it to fit different dimensions — Instagram post, story, banner ad, print flyer — without the designer manually rebuilding the layout each time.
Example use case: A social media designer builds one campaign banner and needs it in 15 different sizes for various platforms. An auto-resize tool adapts the layout automatically, keeping text readable and elements proportioned, cutting a half-day task down to about twenty minutes of review.
Pros:
- Huge time saver for multi-platform campaigns
- Keeps branding consistent across sizes
- Reduces repetitive manual resizing work
Cons:
- Complex layouts sometimes need manual adjustment after resizing
- Text can overflow or look cramped in extreme size differences
- Works best with simpler, grid-based designs rather than highly custom layouts
5. Color Palette and Font Pairing Assistants
These tools suggest color combinations or font pairings based on a reference image, brand color, or mood.
Example use case: A designer uploads a product photo, and the tool suggests a palette that complements the dominant colors in the image — useful when starting from scratch on a brand identity project.
Pros:
- Speeds up the early exploration phase of branding work
- Good starting point when a client has no existing brand guidelines
- Helps avoid clashing color choices
Cons:
- Suggestions can feel generic or overused across many projects
- Doesn’t account for brand personality or industry context on its own
- Still needs a trained eye to refine into something distinctive
6. Mockup Generators
These place a design onto a realistic product photo — a t-shirt, a phone screen, a billboard — so clients can visualize the final result without needing an actual photoshoot.
Example use case: A packaging designer finishes a label design and drops it onto a pre-made bottle mockup to show the client how it’ll look on shelf, instead of waiting for a physical sample to be printed.
Pros:
- Great for client presentations and portfolio pieces
- Saves money compared to commissioning real product photography
- Wide variety of templates for almost any product type
Cons:
- Overused mockup templates can look generic if not customized
- Lighting and perspective sometimes don’t match perfectly
- Free mockup tools often have limited template libraries
How to Choose the Right Tools for Your Workflow
Rather than trying to adopt everything at once, match tools to where your actual bottlenecks are:
- If you spend hours doing product photo cleanup → prioritize a background removal tool with batch processing
- If you’re constantly resizing the same design for different platforms → an auto-resize layout tool will save the most time
- If early concept work eats up your day → a concept generation tool can speed up the brainstorming phase
- If you inherit old or low-quality client assets often → an upscaling tool pays for itself quickly
- If client presentations are a weak point → mockup generators make a big visual difference with little effort
A Realistic Look at the Downsides
It’s worth being honest about where these tools still fall short, because over-relying on them can actually hurt your output:
- Generic results — many of these tools pull from similar training data, so outputs can start looking samey if you don’t customize heavily
- Client trust issues — some clients are wary of generated visuals in final deliverables, so it’s worth clarifying expectations upfront
- Learning curve for good prompts or inputs — getting quality results often takes some trial and error, not just typing the first thing that comes to mind
- File quality for print — a lot of generated or enhanced images aren’t automatically print-ready and need color correction or resolution checks
Free vs Paid Tools: What’s the Real Difference
| Feature | Free Tools | Paid Tools |
|---|---|---|
| Resolution/output quality | Often capped or watermarked | Higher resolution, no watermark |
| Batch processing | Usually limited or unavailable | Available on most paid plans |
| Commercial usage rights | Sometimes restricted | Usually clearer licensing terms |
| Speed/priority processing | Slower, queued | Faster, priority access |
| Template/asset libraries | Smaller | Much larger |
| Best for | Occasional or personal projects | Regular client and agency work |
If you’re freelancing occasionally or just experimenting, free versions are a solid starting point. If these tools are becoming part of your daily workflow, a paid plan usually pays for itself in saved hours within the first few projects.
Building These Tools Into a Daily Workflow
The designers getting the most value out of these tools aren’t using them for everything — they’re using them strategically. A common pattern looks like this:
- Use a concept tool for early mood boards and client pitches
- Move into manual design work once a direction is approved
- Use background removal and upscaling for asset prep along the way
- Use auto-resize tools at the end for exporting across platforms
- Finish with a mockup generator for the client presentation
This keeps the creative decision-making in the designer’s hands while automating the repetitive steps around it.
Pros and Cons Overall
Pros:
- Cuts down significantly on repetitive, time-consuming tasks
- Speeds up client pitches and concept exploration
- Makes small design teams and freelancers more competitive on turnaround time
- Lowers costs on things like stock photography and product photoshoots
Cons:
- Can lead to generic-looking output if used without customization
- Licensing and usage rights vary by tool and need checking before commercial use
- Still requires a trained eye to refine and finalize anything client-facing
- Free tiers often come with real limitations that push you toward paid plans
Frequently Asked Questions
Do I need design experience to use these tools?
Basic design knowledge still helps a lot, especially for judging what looks good and fixing awkward output. These tools speed up execution, but they don’t replace an eye for composition, color, and typography.
Are images from concept generation tools safe to use commercially?
This depends entirely on the specific tool’s licensing terms. Some allow full commercial use, others have restrictions or require attribution. Always check the terms before using output in paid client work.
Will these tools replace graphic designers?
Not in any meaningful way for most design work. They handle repetitive tasks well, but strategic thinking, brand understanding, and client communication are still very much human-driven parts of the job.
What’s the best tool for a freelancer just starting?
Start with a background removal tool and a mockup generator — they offer the most immediate time savings for the least learning curve, and many have solid free tiers.
Can these tools handle print-quality work?
Some can, especially upscaling tools, but always double-check resolution and color profiles before sending anything to print. Output that looks fine on screen doesn’t always meet print standards.
How do I avoid my designs looking generic when using these tools?
Treat tool output as a starting point, not a final product. Customize colors, add your own typography, and combine multiple tools rather than relying on one for the whole project.
Conclsion
The best approach in 2026 is treating these tools as time-savers for the repetitive parts of design work, not shortcuts around the creative thinking that makes a design actually good. Pick the ones that solve your specific bottlenecks — whether that’s photo cleanup, resizing, or concept exploration — and build them into your workflow gradually. Used well, they free up hours you can spend on the part of the job that actually needs your judgment.