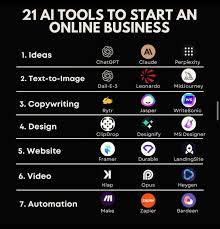
If you want to grow a YouTube channel, build a content business, or just experiment with video creation — but you don’t want to appear on camera — faceless videos are one of the smartest formats to work with right now.
The good news? You don’t need to spend money to get started. Several solid free tools handle everything from script to voiceover to final edit. This guide walks you through the best free tools for making faceless videos, what each one actually does well, and where they fall short.

Creating faceless videos has never been easier than it is in 2026. Thanks to powerful free AI tools, anyone can produce engaging content for YouTube, TikTok, Instagram Reels, and other platforms without showing their face or investing in expensive equipment. AI can now handle script writing, voiceovers, video generation, subtitles, stock footage selection, and editing, making the entire content creation process faster and more accessible.
Faceless content has become a popular strategy for creators in niches such as finance, technology, education, motivation, storytelling, and business case studies. Many successful channels generate thousands of views using AI-generated visuals, realistic text-to-speech voices, and automated editing workflows. The best part is that many of these tools offer generous free plans, allowing beginners to start creating content without spending money.
In this guide, we’ll explore the best free AI tools for faceless videos in 2026, comparing their features, strengths, limitations, and ideal use cases. Whether you’re launching your first YouTube automation channel or looking to scale your existing content production, these free AI solutions can help you create professional-quality videos with minimal effort.
What Are Faceless Videos, and Why Are They So Popular?
Faceless videos are video content where the creator never appears on screen. Instead, you see things like screen recordings, stock footage, animated text, slideshows, or illustrated visuals — usually paired with a voiceover or background music.
Channels that post finance breakdowns, motivational content, history explainers, “top 10” lists, and news summaries often go faceless. It’s a format that works at scale because once you have a production process, you can publish consistently without worrying about lighting, makeup, or being camera-ready.
Now let’s get into the tools.
Free AI Tools for Faceless videos in 2026:-
1. Canva (Free Plan) — Visuals and Video Editing
Best for: Creating video slideshows, animated text, and short-form content
Canva’s free plan gives you access to a video editor that’s genuinely useful for faceless content. You can build a video from scratch using templates, drop in stock images or short video clips, add text overlays, and export a finished MP4 — all without paying anything.

Practical example: Say you’re running a “5 Money Habits” YouTube channel. You can open Canva, pick a vertical or horizontal video template, add one key point per slide with bold text, drop in a relevant background clip from their free media library, and export it in minutes.
What works well:
- Clean drag-and-drop interface
- Decent library of free templates and stock clips
- Easy text animation options
- Works in-browser, no download needed
What doesn’t:
- Free plan has a watermark on some premium elements (easy to avoid if you stick to free assets)
- Not ideal for longer, more complex videos
- No built-in voiceover generation
Pros:
- Zero learning curve
- Covers design and basic video in one place
- Regular updates add new features
Cons:
- Export quality is capped on the free plan
- Limited storage
- Not suitable for YouTube-length videos on its own
2. CapCut (Free) — Full Video Editor for Faceless Content
Best for: Editing longer videos, adding captions, and finishing touches
CapCut is one of the most capable free video editors available right now, and it’s particularly good for faceless video creators. The desktop and mobile versions both offer auto-captioning, text-to-speech (with multiple voice options), background removal, and a library of royalty-free music.
Practical example: You’ve written a 500-word script about “How to Save Money on Groceries.” You record the voiceover using your phone or a free voice tool, import it into CapCut, drop stock footage on top of it, and use the auto-caption feature to add moving subtitles. The whole thing can be done in under an hour.
What works well:
- The auto-caption feature is fast and reasonably accurate
- Text-to-speech voices sound decent for short content
- Lots of transition effects and overlays are available for free
- Regular feature updates
What doesn’t:
- The desktop version is slightly more stable than mobile for longer projects
- Some effects are locked behind the pro version
Pros:
- Completely free for most features
- Works for both short-form (Reels, TikTok) and long-form (YouTube)
- Strong community tutorials available online
Cons:
- Can feel cluttered if you’re new to video editing
- Text-to-speech voices can sound robotic on longer scripts
- Some free assets are not fully royalty-free for commercial use — always double-check
3. InVideo (Free Plan) — Script to Video Workflow
Best for: Turning written content into a structured video quickly
InVideo is designed specifically for content creators who want to go from a script or a topic to a finished video. The free plan gives you access to templates, a stock media library, and basic text-to-speech tools.

Practical example: You have a blog post about “Best Budget Travel Destinations in 2025.” Paste the content into InVideo’s text-to-video feature, select a template, and it will try to match sections of your text to relevant stock footage. You then go through and swap out any clips that don’t fit.
What works well:
- Template-driven workflow saves a lot of time
- Wide range of topic-specific templates
- Decent stock footage library included in the free plan
What doesn’t:
- Free plan exports include a watermark
- 60 exports per month on the free tier
- The auto-matching of footage to script isn’t always accurate
Pros:
- Structured workflow is great for beginners
- Good for batch content creation
- In-browser, no installation
Cons:
- Watermark is prominent on free exports
- Limited customization compared to a standalone editor
- Can feel restrictive once you start scaling output
4. ElevenLabs (Free Tier) — Voiceover Generation
Best for: Creating natural-sounding voiceovers without recording yourself
If there’s one area where free tools have genuinely improved, it’s voiceover. ElevenLabs offers a free tier that gives you a set number of characters per month, which you can use to generate realistic-sounding narration from your written script.
The voice quality on ElevenLabs is noticeably better than most alternatives. For faceless videos, this matters a lot — a bad voiceover can kill an otherwise solid video.
Practical example: You write a 300-word script for a YouTube Short about “3 Habits That Changed My Morning.” Paste it into ElevenLabs, pick a voice that fits your channel tone, and download the audio file. Import it into CapCut or any other editor, and you’ve got a professional-sounding voiceover.
What works well:
- Voice quality is genuinely impressive at this price point (free)
- Multiple voice styles to choose from
- Fast generation
- Supports multiple languages
What doesn’t:
- Free tier gives you around 10,000 characters per month — enough for short content, but limiting if you post daily
- No direct export to video editors; it’s audio only
Pros:
- Best free voice quality available right now
- Easy to use, even for first-timers
- Reliable output with minimal errors
Cons: Themonthlyy character limit can run out quickly
- Monthly character limit can run out quickly
- Accents and emotional range can still sound slightly off
- You’ll need a separate tool for the video side
5. Pexels and Pixabay — Free Stock Footage
Best for: Finding background footage and B-roll for any faceless video
These aren’t editing tools, but they’re essential to the workflow. Pexels and Pixabay both offer completely free, high-quality stock footage with licenses that allow commercial use.
For faceless video creators, stock footage is the visual backbone. You write a script, generate a voiceover, then layer relevant footage on top. Pexels has a cleaner interface; Pixabay has a slightly larger library.
Practical example: Your script covers the topic “Why People Quit Their Jobs.” You search “office stress” and “resignation” on Pexels, download four or five clips, and use them as background footage while your voiceover plays.
Pros:
- Completely free, commercial use allowed
- High-quality clips (many in 4K)
- No account required on Pexels
Cons:
- Search results can be hit or miss for specific topics
- Clips can feel overused in certain niches (finance, motivation)
- No video editing functionality — strictly a media library
6. DaVinci Resolve (Free Version) — Advanced Editing
Best for: Creators who want professional-level editing without paying
DaVinci Resolve’s free version is arguably the most powerful free video editor available. It has everything — color correction, audio mixing, titles, transitions, and a full timeline editor. The learning curve is steeper, but if you’re serious about creating faceless videos at a consistent level of quality, it’s worth learning.
DaVinci Resolve is one of the most powerful free video editing tools available in 2026, offering professional-grade features that rival many paid editing programs. Originally designed for Hollywood-level post-production, the software has become a favorite among YouTube creators, filmmakers, and faceless content producers who need advanced editing capabilities without a subscription fee.
The free version includes a comprehensive set of tools for video editing, color correction, visual effects, motion graphics, audio enhancement, and content export. Creators can trim clips, add transitions, create dynamic text animations, improve audio quality, and produce polished videos suitable for YouTube, TikTok, Instagram Reels, and other platforms. Its powerful timeline editor provides precise control over every aspect of a project, making it ideal for creators who want more flexibility than simple AI video generators.
For faceless video channels, DaVinci Resolve works particularly well when combining AI-generated voiceovers, stock footage, screen recordings, and animations into a professional final product. The software also includes the Fusion visual effects workspace and Fairlight audio tools, allowing creators to enhance production quality without relying on additional software.
Although the learning curve is steeper than beginner-friendly editors, the free version offers tremendous value and virtually no limitations for most content creators. As your channel grows, DaVinci Resolve provides enough advanced features to support professional-level video production while remaining completely free for the majority of users. For creators seeking maximum editing power without monthly fees, it remains one of the best free video editing solutions in 2026.
Practical example: You’ve been creating faceless finance content for three months and want to level up your editing. Instead of relying on CapCut or Canva, you move to DaVinci. You import your voiceover, stack B-roll footage from Pexels, add custom lower thirds, and color grade the final video to look more cinematic.
Pros:
- Completely free with no watermark
- Professional-grade features
- Used in actual film and TV production
- Great for long-form YouTube content
Cons:
- High learning curve for beginners
- Requires a decent computer to run smoothly
- Overkill for short-form or simple content
7. Pictory (Free Trial) — Auto Video from Long Content
Best for: Turning long-form content (blogs, articles) into short video clips
Pictory lets you paste a blog post or script, and it will automatically create a video with matching stock footage and captions. The free trial gives you limited projects to test it out before committing to a paid plan.
It’s not a permanent free solution, but if you want to test the script-to-video format before investing, Pictory’s trial is useful.
Pictory is one of the most popular AI-powered video creation tools for turning long-form content into engaging faceless videos. With its free trial, creators can quickly transform blog posts, articles, scripts, podcasts, webinars, or lengthy videos into short, shareable content for YouTube, TikTok, Instagram Reels, and other social platforms.
The platform uses AI to analyze your text and automatically select relevant visuals, stock footage, transitions, and captions. This eliminates much of the manual editing work that typically takes hours. Pictory also includes automatic subtitle generation, making videos more accessible and increasing viewer engagement. Since many users watch videos with the sound off, built-in captions can significantly improve watch time.
For faceless YouTube channels, Pictory is especially useful because it allows creators to build professional-looking videos without recording themselves. Simply paste a script or article, choose a template, and let the AI generate a complete video. You can then customize scenes, add branding elements, change voiceovers, and adjust music to match your style.
The free trial gives users a chance to explore the platform’s core features before upgrading to a paid plan. While advanced exports and longer video lengths require a subscription, the trial is more than enough to test whether Pictory fits your content creation workflow. For creators looking to repurpose existing content into high-quality faceless videos, Pictory remains one of the most efficient AI tools available in 2026.
Pros:
- Fast content repurposing
- Auto scene matching from text
- Good for creating multiple short clips from one article
Cons:
- Free tier is very limited (3 videos on trial)
- Watermark on free exports
- Not suitable as a long-term free tool
Putting It All Together: A Simple Free Workflow
Here’s how you can combine these tools into a repeatable production system without spending anything:
- Write your script — Use Google Docs or any text editor
- Generate voiceover — Paste script into ElevenLabs, download the audio
- Find footage — Download relevant clips from Pexels or Pixabay
- Edit the video — Import audio and footage into CapCut or DaVinci Resolve
- Add captions — Use CapCut’s auto-caption feature
- Add thumbnail — Design it in Canva using their free templates
- Export and upload — Done
That’s a complete, zero-cost workflow that produces a watchable, professional-looking video.
FAQs
Can I monetize videos made with these free tools?
Yes, in most cases. However, always check the licensing terms for any stock footage or audio you use. Pexels and Pixabay footage is generally safe for commercial use. For ElevenLabs and CapCut, review the terms specific to your plan to confirm monetization rights.
Do any of these free tools add watermarks?
CapCut and DaVinci Resolve (free version) do not add watermarks. InVideo’s free plan does. Canva only watermarks content that uses premium elements — if you stick to free assets, you’re fine.
What’s the best tool for a complete beginner?
Start with CapCut for editing and ElevenLabs for voiceovers. They’re the easiest combination to get started with and cover the two most important parts of faceless video production.
How long does it take to make a faceless video with these tools?
Once you know the workflow, a 5–8 minute YouTube video can take anywhere from 2–4 hours to produce from scratch. Short-form content (under 60 seconds) can be done in 30–45 minutes once you’re comfortable.
Is there a fully free tool that does everything in one place?
Not quite — most tools specialize in one area. The closest to an all-in-one free option is CapCut, which handles editing, captions, basic voiceover, and music. But for the best results, combining two or three tools gives you more control over quality.
Do I need a powerful computer to use these tools?
CapCut, Canva, and InVideo run in-browser or on modest hardware. DaVinci Resolve needs more processing power — at least 8GB RAM and a dedicated GPU for smooth performance.
Conclsion
You don’t need to invest in expensive software to start making faceless videos. The free tools available today — particularly CapCut, ElevenLabs, Canva, and Pexels — are more than enough to build a consistent content operation.
The key is to pick a workflow that matches your current skill level and stick with it long enough to get efficient. Most new creators spend too much time switching tools. Start simple: pick one editor, one voice tool, one stock footage source. Get 10 videos out the door. Then upgrade your stack when you know exactly what you need.