Starting a YouTube channel without showing your face is one of the smartest moves you can make as a new creator. You do not need a camera, studio lighting, or years of experience. All you need is a good topic, the right tools, and a consistent schedule.

The best part? Most of the tools you need to get started are completely free.
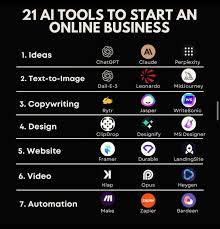
This guide covers the Free AI Tools for a Faceless YouTube Channel for building a faceless YouTube channel from scratch — what each one does, how to use it practically, and what to watch out for. Whether you want to make motivation videos, finance content, Reddit story clips, tutorial videos, or business explainers, these tools will help you build a full production workflow without spending a single rupee or dollar.
What Is a Faceless YouTube Channel?
A faceless YouTube channel is one where the creator never appears on camera. Instead of recording yourself, you use stock footage, animations, screen recordings, gameplay clips, or text visuals combined with a voiceover or on-screen text to deliver your content.
Many of the largest channels on YouTube today are faceless. Finance channels that explain investing concepts using charts and stock footage, motivation channels built around cinematic clips and quotes, Reddit story channels that use gameplay in the background while narrating online posts — all of these are faceless formats.
This works because viewers on YouTube are watching for value, entertainment, or information. They do not care whether they can see the creator’s face. What they care about is whether the video keeps their attention and teaches or entertains them.
Why Faceless Content Works So Well on YouTube
There are practical reasons why faceless channels grow consistently.
You can produce content much faster without filming yourself. There is no need to set up a camera, worry about how you look, record multiple takes, or deal with shaky footage. The production process is simpler from start to finish.
You also stay private. Many creators prefer not to be publicly recognizable, especially when starting. A faceless channel lets you build an audience and generate income without becoming a public figure.
The format is also easier to scale. Once you have a workflow in place — script, voiceover, visuals, edit, upload — you can repeat it quickly and consistently. Some creators run multiple faceless channels at the same time using this kind of system.
And the costs are low. Most of the tools covered below have solid free tiers that are more than enough to get started.
Best Free AI Tools for a Faceless YouTube Channel
1. CapCut — Free Video Editor for YouTube Content
CapCut is one of the most popular free video editors available right now, and it is an excellent starting point for faceless creators. The desktop version is free and packed with features that would cost money on other platforms.
You can edit videos, add transitions, insert text overlays, apply filters, include background music, and generate automatic subtitles — all inside one app. The auto-caption feature alone is worth using because subtitles are essential for watch time. Many viewers watch YouTube videos without sound, especially on mobile.
How to use it practically: Say you are running a finance channel about cryptocurrency. You can download free stock footage of trading screens and city skylines, record a short voiceover script using your phone microphone, drop everything into CapCut, add subtitles automatically, and export a clean video in under an hour. The whole thing costs nothing.
CapCut also supports horizontal 16:9 video formats for standard YouTube uploads, not just vertical short-form content. Many faceless YouTube creators use it as their main editor.
Pros: Completely free for most features, auto-subtitle generation, beginner-friendly interface, fast export, and works on desktop and mobile.
Cons: Some advanced effects require an internet connection, and very long videos can slow down on older computers.
2. Canva Free — For Thumbnails and Short Video Content
A great thumbnail can double your click-through rate on YouTube. Canva‘s free plan gives you access to a large library of templates, fonts, graphics, and design tools that make thumbnail creation straightforward, even if you have no design experience.
Beyond thumbnails, you can also use Canva to create simple animated videos, intro sequences, end screens, and channel banners. The free tier includes enough templates and stock elements to build professional-looking graphics without paying anything.
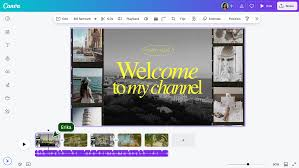
How to use it practically: If you run a business motivation channel, you can create a thumbnail in Canva using a bold headline, a high-contrast background, and a simple icon. Paste in the title of your video, adjust the colors, and download it in seconds. Doing this consistently will make your channel look professional, even with zero design budget.
Canva’s video editor also lets you create short clips using stock footage, text animations, and music — useful for YouTube Shorts or intro sequences.
Pros: Free plan is genuinely useful, easy to learn, large template library, great for thumbnails and graphics, and works in the browser without downloading anything.
Cons: The free plan has limited access to premium stock assets, and export options are slightly restricted compared to the paid version.
3. DaVinci Resolve — Free Professional Video Editor
If you want more editing power than CapCut without paying for premium software, DaVinci Resolve is the answer. The free version is one of the most powerful video editors available at any price point. Hollywood productions use the paid version of this software, and the free tier still includes an enormous range of professional tools.
For faceless YouTube creators, DaVinci Resolve handles everything from basic cutting and color correction to advanced transitions, audio mixing, and subtitle work. It takes a little longer to learn than CapCut, but once you get comfortable with it, your videos will look noticeably more polished.
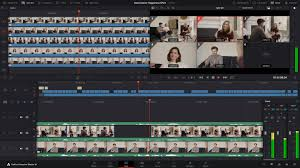
How to use it practically: A faceless history channel that combines narration with stock footage and dramatic music can use DaVinci Resolve to color grade clips so they all match tonally, sync audio precisely, and export at the right quality settings for YouTube. The result looks far more cinematic than a basic mobile edit.
Pros: Extremely powerful for a free tool, professional-grade color correction and audio tools, no watermarks on free exports, and works on Windows, Mac, and Linux.
Cons: Steep learning curve for beginners, requires a reasonably capable computer, interface can feel overwhelming at first.
4. Pexels and Pixabay — Free Stock Footage
Stock footage is the backbone of most faceless YouTube channels. Without it, you have nothing to show while your voiceover plays. Both Pexels and Pixabay offer large libraries of completely free stock videos that you can use in your YouTube content without copyright issues.
You will find footage covering cities, nature, technology, business, people, food, travel, and much more. The quality ranges from standard to genuinely cinematic on both platforms.
How to use it practically: A travel facts channel can download free drone footage of Tokyo, Paris, or New York from Pexels, combine it with a narration script about interesting facts about each city, add background music, and produce a video that looks like it cost money to film — without leaving your desk.
Search specifically rather than using broad terms. Instead of searching “city,” search “Tokyo night streets 4K” or “New York aerial downtown” to find footage that fits your specific video.
Pros: Completely free, no attribution required on most content, large and growing libraries, good search functionality.
Cons: Popular footage gets used by many channels, which can make videos look similar to competitors. Mix sources to keep things fresh.
5. ElevenLabs Free Plan — Realistic Voiceovers
A good voiceover makes a huge difference in how professional a faceless YouTube video sounds. ElevenLabs offers a free plan that gives you a limited number of characters per month to generate realistic narration voices.
The voices on ElevenLabs sound genuinely natural — not robotic or awkward like older voice tools. For creators who do not want to record their own voice or who want a consistent narrator voice across all their videos, this is one of the best free options available.
How to use it practically: A facts or education channel can write a 300-word script, paste it into ElevenLabs, choose a clear and calm voice, and download a high-quality audio file in seconds. That audio file goes directly into your video editor as the narration track.
The free plan has monthly limits, so it works best for shorter videos or creators who are just getting started. As your channel grows, upgrading to a paid plan makes sense.
Pros: Highly realistic voices, easy to use, multiple voice options, fast generation, and good audio quality.
Cons: Free plan has a character limit each month, and some of the best voices are locked behind paid plans.
6. Audacity — Free Audio Editor
Audio quality is one of the most underrated factors in YouTube success. If your audio sounds bad, viewers leave — even if your visuals are great. Audacity is a free, open-source audio editor that lets you clean up voiceovers, remove background noise, adjust volume levels, and make your narration sound much cleaner.
If you record your own voice using a phone or a basic microphone, running the audio through Audacity before adding it to your video will make a noticeable improvement.
How to use it practically: Record your voiceover on your phone in a quiet room, import the audio file into Audacity, use the noise reduction tool to remove any hiss or background hum, normalize the volume so it stays consistent, and export a clean MP3 or WAV file ready for your video editor.
Pros: Completely free, powerful noise reduction tools, works on all operating systems, no watermarks or limits.
Cons: The interface looks dated and can feel confusing for beginners, as it is not designed for video editing.
7. ChatGPT Free — Script Writing
Writing a strong script is where every good faceless video starts. The free version of ChatGPT is a practical tool for generating script outlines, full video scripts, hook ideas, and video title suggestions.
You do not need to use the output word-for-word. Instead, treat it as a starting draft that you edit and improve with your own voice and knowledge. The tool is particularly useful when you are short on time or stuck on how to structure a topic.
How to use it practically: If you run a personal finance channel and want to make a video about building an emergency fund, you can prompt ChatGPT with: “Write a YouTube video script about how to build a 3-month emergency fund. Keep it conversational and practical, around 500 words.” Edit the result to add your own opinions, examples, and phrasing, and you have a usable script in minutes.
Pros: Free tier is genuinely useful, fast idea generation, good for outlines and first drafts, and helps with titles and descriptions too.
Cons: Output needs human editing to avoid generic phrasing, free plan has usage limits during peak times.
8. YouTube Studio — Built-In Free Tools
YouTube Studio itself is often overlooked as a tool. Once you upload a video, YouTube automatically generates captions, provides analytics showing where viewers stop watching, suggests tags, and gives you data on click-through rates and impressions.
These insights are valuable for improving future videos. If your analytics show that viewers drop off after 45 seconds, you know your intro is too slow. If your click-through rate is low, your thumbnail or title needs work.
How to use it practically: After your first ten videos, review the audience retention graph for each one inside YouTube Studio. Identify the points where viewers leave and think about what you can change — tighter editing, a stronger hook, less slow intro content. Use this data to improve every video you make.
Pros: Completely free, built directly into YouTube, provides detailed analytics, and auto-generates captions.
Cons: Auto-generated captions sometimes have errors that need manual correction.
9. Opus Clip Free Plan — Repurpose Videos into Shorts
Once you have a longer YouTube video, Opus Clip lets you automatically extract the best moments and convert them into vertical clips for YouTube Shorts, TikTok, and Instagram Reels. The free plan allows a limited number of clips per month, which is enough to get started.
This is a smart strategy because Shorts can bring new viewers to your main channel. Many faceless creators now run both a main YouTube channel and a Shorts channel using the same content.
How to use it practically: Upload a 10-minute finance explainer video to Opus Clip, let it identify the most engaging 30 to 60-second moments, add the automatically generated captions, and download the vertical clips. Post them as Shorts, pointing viewers to the full video on your channel.
Pros: Saves time repurposing content, auto-captions included, good clip detection on most video types.
Cons: Free plan limits the number of exports per month, clip selection is not always perfect,t and may need manual review.
Recommended Free Tool Stack by Channel Type
Different faceless channel types work better with slightly different tool combinations.
Motivation or quotes channel: Canva for visuals and thumbnails, CapCut for editing and captions, ElevenLabs for narration, Pexels for cinematic footage.
Finance or business channel: ChatGPT for scripts, ElevenLabs for voiceover, Pexels and Pixabay for footage, DaVinci Reediting, and Canva for thumbnails.
Tutorial or screen recording channel: OBS Studio (free) for screen recording, Audacity for audio cleanup, CapCut or DaVinci Resolve for editing.
Reddit story or storytelling channel: ChatGPT for scripts, ElevenLabs for narration, CapCut for editing with subtitles, free gameplay footage as background visuals.
Pros and Cons of Using Free Tools
Pros
Starting with free tools means zero financial risk. You can test whether a niche works before investing any money. Most of the free tiers covered here are genuinely functional, not just trial versions with major restrictions. You can build and grow a real channel without paying for anything until you are already earning.
Cons
Free plans often have limits — monthly usage caps, watermarks, or restricted access to premium features. As your channel grows, you will likely want to upgrade at least one or two tools. Free stock footage is also used by many other creators, so your videos may occasionally look similar to competitors. Mixing footage sources and using your own graphics helps reduce this.
Tips for Growing Your Faceless Channel Faster
Hook viewers in the first five seconds. Most viewers decide whether to keep watching within the opening moments. Start with a question, a surprising fact, or a bold statement that makes them want to stay.
Keep your pace tight. Cut anything that does not move the video forward. Dead air, slow intros, and unnecessary filler are the main reasons viewers leave early.
Post consistently. Two videos per week is a good starting target for a new channel. Consistency signals to the algorithm that your channel is active and worth recommending.
Study your analytics. Use YouTube Studio to understand where viewers drop off and what titles and thumbnails get the most clicks. Let data guide your improvements.
Pick one niche and stay in it. Mixed-topic channels are harder to grow. A channel that covers only finance, or only motivation, or only tech tutorials will build a loyal audience faster than one that covers everything.
FAQs About Free Tools for Faceless YouTube Channels
Can I really start a faceless YouTube channel for free? Yes. Every tool covered in this guide has a free tier that is functional enough to start. You can script, record a voiceover, collect stock footage, edit, and upload a complete video without spending anything.
Do I need a voiceover for a faceless channel? Not necessarily. Some successful faceless channels use only on-screen text and background music. However, a voiceover usually improves watch time because it keeps viewers engaged through audio as well as visuals.
Which free editor is best for YouTube — CapCut or DaVinci Resolve? CapCut is better for beginners who want to get videos done quickly. DaVinci Resolve is better if you want more control over color, audio, and advanced effects. Many creators start with CapCut and switch to DaVinci Resolve after a few months.
Is free stock footage safe to use on YouTube? Pexels and Pixabay use Creative Commons Zero licenses on most of their content, which means you can use the footage commercially without attribution. Always check the individual license for each clip before using it.
How long does it take to make a faceless YouTube video? With practice, a 5 to 8-minute video using free tools can be produced in two to four hours. The first few videos will take longer as you learn the workflow.
Can faceless channels get monetized? Yes. Faceless channels qualify for YouTube’s Partner Program once they meet the standard requirements — 1,000 subscribers and 4,000 watch hours. Many faceless channels earn through ads, sponsorships, and affiliate links.
Do I need to show my face to build a loyal audience? No. Many faceless channels have highly engaged audiences. Consistency, quality content, and a recognizable style matter more than appearing on screen.
Conclusion
Building a faceless YouTube channel with free tools is completely realistic in 2026. The tools available today make the entire process — scripting, voiceover, stock footage, editing, thumbnails, and analytics — possible without spending anything upfront.
Start simple. Pick one niche, build a basic workflow using two or three of the tools above, and focus on publishing consistently. Your first ten videos will teach you more than any guide can. As your channel grows and starts generating income, upgrading to paid features where it matters most becomes an easy decision.
The creators who succeed with faceless channels are not necessarily the ones with the best tools. They are the ones who show up consistently, improve with each video, and stay focused on giving their audience something genuinely worth watching.