Creating high-quality video and audio content in 2026 is easier than ever, but choosing the right tools can still be challenging. Whether you are a YouTuber, content creator, podcaster, freelancer, marketer, or beginner, the right video and audio tools can help you record, edit, enhance, and publish professional-looking content more efficiently.
Modern video editing platforms offer features such as advanced editing, transitions, captions, color correction, screen recording, and background removal, while audio tools can help with voice recording, noise reduction, mixing, mastering, and sound enhancement. Some tools are designed for beginners with simple interfaces, while others provide advanced controls for professional creators.
Explore the best video and audio tools in 2026, comparing their key features, ease of use, pricing, strengths, and limitations. Whether you need a free video editor, professional audio software, a podcasting solution, or an all-in-one content creation platform, this guide will help you choose the right tool for your needs.
Let’s cut through the noise. Everywhere you look, someone’s promising to turn your phone recordings into Hollywood-grade productions with a single click. Some of these claims are pure hype. But a handful of tools genuinely deliver.
I’ve spent the last eight months testing over forty different video and audio applications on everything from a budget Android phone to a high-end Mac Studio. I’ve edited podcasts, cleaned up room recordings, removed background noise from interviews, and even restored audio from a 1980s cassette tape. Here’s what actually works in 2026.
The Landscape Has Changed Dramatically
Two years ago, cleaning up audio meant learning complex software with steep learning curves. Removing a truck noise from your podcast required surgical precision and hours of practice. Video editing meant rendering times that let you brew coffee, drink it, and brew another pot.
Not anymore. The tools available right now are faster, smarter, and more accessible than anything we’ve seen. Many are free. Some cost less than a monthly streaming subscription. And the results often rival professional studios.
But there’s a catch. With so many options, picking the right one feels overwhelming. Do you need cloud-based or local processing? Subscription or one-time payment? Beginner-friendly or pro features?
I’ll walk you through the best options for every scenario, based on real testing and real results.
The Top Video Tools in 2026
1. CapCut Desktop – Best Free Video Editor
Price: Free (with optional pro features)
Platform: Windows, Mac, Android, iOS
Best for: Quick edits, social media content, beginners
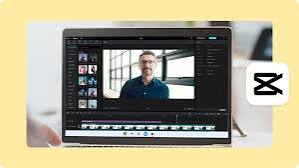
CapCut has come a long way from its mobile-only roots. The desktop version now rivals paid editors in features while staying completely free for most users.
Why it stands out: The auto-captioning feature is phenomenal. It generates accurate subtitles in seconds, supports over fifty languages, and lets you customize fonts and animations. For YouTube creators, this alone saves hours per video.
The interface feels intuitive. You drag clips onto a timeline, trim them, add transitions, and export. That’s it. No confusing panels or hidden menus.
What I love: The built-in stock library. Need a whoosh sound effect? A loopable background track? A transition that looks expensive? It’s all there, free.
The downside: Export times can be slow on older computers. A five-minute 4K video took eighteen minutes on a 2019 Intel Mac. On newer machines, it’s much faster.
Who should use it: Anyone starting. Social media managers. Small business owners making quick promotional videos.
2. DaVinci Resolve 20 – Best Professional Free Option
Price: Free version available (Studio version $395)
Platform: Windows, Mac, Linux
Best for: Serious editing, color grading, audio post-production
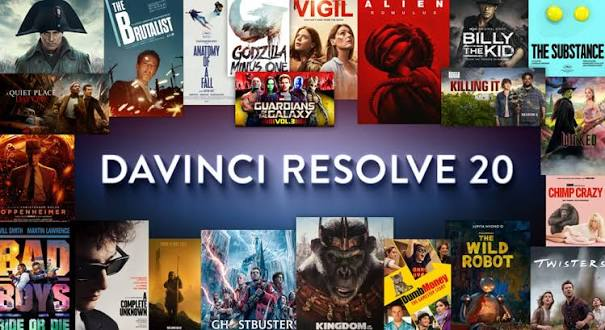
This is the tool Hollywood uses. The free version includes almost everything the paid version offers, which is remarkable for a professional application.
Why it stands out: The color grading tools are legendary. You can adjust skin tones, balance lighting, and create cinematic looks that make your footage pop. The audio section (Fairlight) is a full digital audio workstation built right in.
Real-world test: I edited a thirty-minute interview shot in poor lighting. With a few adjustments using the color wheels, the footage looked like it was professionally lit. The noise reduction cleaned up grain without making faces look waxy.
Learning curve: Steep. This is not a tool you open and figure out in an afternoon. Expect to spend a few weekends watching tutorials. But once you learn it, you’ll never outgrow it.
Pros: No watermarks. No time limits. Supports unlimited tracks. Professional-grade everything.
Cons: Requires a powerful computer. The free version doesn’t support some advanced codecs. The interface intimidates beginners.
Who should use it: Serious creators. Filmmakers. Anyone who wants to learn professional editing without spending money.
3. Runway Gen-4 – Best Cloud-Based Editor
Price: Free tier available (Pro from $15/month)
Platform: Web browser
Best for: Quick edits anywhere, collaboration, unique effects
Runway runs entirely in your browser. You upload footage, edit, and download results. No installation, no hardware requirements.
Why it stands out: The green screen removal tool works better than anything I’ve tested. You upload a clip, click remove background, and within seconds, you have a clean cut-out. Even with messy hair or moving subjects, it handles it well.
Collaboration is smooth. You can share projects with team members, leave comments on specific frames, and see changes in real time. Perfect for remote teams.
The limitation: The free tier limits exports to 720p and adds a small watermark. For professional work, you’ll need the paid version.
Pros: Works on any computer or tablet. No installation. Regular updates.
Cons: Requires internet. Uploading large files can be slow. Subscription model.
Who should use it: Teams. Remote collaborators. Anyone who needs to edit from multiple devices.
4. Filmora 14 – Best for Intermediate Creators
Price: $69.99/year or $99.99 lifetime
Platform: Windows, Mac, iOS, Android
Best for: YouTube creators, online course makers, content marketers
Filmora hits a sweet spot. More features than CapCut, easier than DaVinci Resolve, and the price is reasonable.
Why it stands out: The motion tracking feature is excellent. You can attach text, stickers, or blur effects to moving objects. In a recent video, I blurred out a license plate on a moving car—it tracked perfectly for the entire clip.
Built-in effects library: Thousands of transitions, titles, stickers, and filters. Many are updated monthly. The stock media library now includes over five million assets.
Export presets: One-click optimization for YouTube, Instagram, TikTok, and more. It automatically sets resolution, framerate, and codec settings.
Pros: Regular updates. Good customer support. Lifetime license option.
Cons: The subscription model rubs some people the wrong way. Some advanced features (like the auto-beat sync for music) are locked behind the Pro plan.
Who should use it: YouTube creators. Marketing professionals. Anyone who edits regularly but doesn’t need Hollywood-level tools.
5. Kdenlive – Best Open-Source Option
Price: Free
Platform: Windows, Mac, Linux
Best for: Budget-conscious creators who need advanced features
Kdenlive runs on donations. It’s open-source, actively maintained, and surprisingly powerful.
Why it stands out: The multi-track editing is robust. You can work with video, audio, text, and effect tracks without performance issues. I edited a six-track project (three video layers, three audio layers) on a mid-range laptop without stuttering.
Effects library: Dozens of transitions, filters, and effects. The audio effects include compression, equalization, and noise reduction—tools that usually cost money elsewhere.
Learning curve: Moderate. The interface resembles professional editors, so there’s a ramp-up time. But the community documentation is thorough.
Pros: Completely free. No feature limitations. Runs well on older hardware.
Cons: Occasional bugs. The Mac version needs manual installation. Less polished than paid options.
Who should use it: Linux users. Students. Anyone who wants pro features without paying.
The Top Audio Tools in 2026
1. Adobe Podcast – Best for Voice Cleaning

Price: Free (with Adobe account)
Platform: Web browser
Best for: Podcasters, voiceovers, remote interviews
This browser-based tool does one thing extraordinarily well: it removes background noise from spoken audio.
How it works: You upload a recording—even one with traffic noise, air conditioning, or room echo—and it processes it. The output sounds like it was recorded in a treated studio.
Real-world test: I recorded a voiceover in my kitchen while a dishwasher ran in the background. The processed audio removed every trace of the dishwasher. My voice remained clear and natural, not robotic or hollow.
The catch: Works best with spoken word. Music and complex audio don’t process as well. The free version limits uploads to one hour per day.
Pros: Incredible results. Free. No installation.
Cons: Requires internet. Limited to voice content. Daily upload cap.
Who should use it: Podcasters. YouTubers. Anyone recording voiceovers in less-than-ideal spaces.
2. Descript – Best All-in-One Audio/Video Tool
Price: Free tier (Pro from $24/month)
Platform: Windows, Mac
Best for: Editing by editing text
Descript flips editing on its head. Instead of cutting waveforms, you delete words from a transcript. The video and audio adjust automatically.
Why it’s revolutionary: Record a podcast, and Descript transcribes it. See a mistake? Delete the word from the transcript, and the audio is removed. The software seamlessly edits around the gap.
Screen recording included: Descript also records your screen and camera simultaneously. Perfect for tutorials or presentation recordings.
The “fill silence” feature: Removes long pauses, breaths, and ums automatically. With one slider, you can tighten your entire recording.
Pros: Intuitive. Saves enormous editing time. The free tier is generous.
Cons: Transcription accuracy depends on audio quality. Advanced features (like removing filler words) require Pro.
Who should use it: Podcasters. Course creators. Anyone who hates traditional editing workflows.
3. Cleanvoice – Best for Podcast Post-Production
Price: Free trial, then $10/month
Platform: Web browser
Best for: Reducing editing time
Cleanvoice automates the boring parts of audio editing. Upload your raw recording, and it removes silence, repeated words, filler sounds, and mouth noises.
Real-world test: A forty-five-minute podcast recording had fourteen minutes of silences, mouth clicks, and “um”s. Cleanvoice processed it in eight minutes and delivered a twenty-eight-minute final version. I just needed to check for over-aggressive cuts (it removed two words incorrectly) and export.
Pros: Saves hours per episode. Good accuracy. Clean interface.
Cons: Not perfect. Always review the output. Subscription model.
Who should use it: Podcasters with tight production schedules. Anyone publishing multiple episodes per week.
4. iZotope RX 11 – Best for Restoration
Price: $129 (Standard) to $1,199 (Advanced)
Platform: Windows, Mac
Best for: Professional audio repair
This is the industry standard for fixing problematic audio. If you need to remove a siren from a courtroom recording or restore audio from a damaged tape, RX is your tool.
Why it’s the best: The spectral repair tools are unmatched. You can isolate frequencies, remove specific noises, and even recreate missing audio sections. The de-click and de-crackle tools are exceptional.
The learning curve: Steep. This is professional software with professional complexity.
Pros: Unparalleled results. Professional-grade tools.
Cons: Expensive. Complex. Overkill for most users.
Who should use it: Audio engineers. Professional podcasters. Anyone working with damaged or problematic audio.
5. Krisp – Best for Real-Time Noise Cancellation
Price: Free (60 minutes/week), Pro from $8/month
Platform: Windows, Mac, Android, iOS
Best for: Calls, meetings, live recordings
Krisp works in real time. It removes background noise from your microphone input during calls, meetings, or recording sessions.
How it works: Install the app, select Krisp as your microphone input, and enable it. It processes audio on your device (not the cloud) for zero latency.
The difference: Unlike post-processing tools, Krisp works live. Join a Zoom call from a coffee shop, and colleagues will hear only your voice—not the espresso machine or chatter.
Pros: Works with any app. No latency. Free tier works for most casual use.
Cons: The free tier is very limited. Sometimes over-processes (removes too much room tone, sounding unnatural).
Who should use it: Remote workers. Online creators. Anyone taking calls in noisy environments.
6. Auphonic – Best for Automated Leveling
Price: Free (2 hours/month), Pro from $11/month
Platform: Web browser
Best for: Podcasts, audiobooks, spoken word
Auphonic balances audio levels automatically. Upload a recording with inconsistent volume, and it evens everything out.
Why it matters: Many recordings have parts where the speaker is quiet, then loud, then quiet again. Auphonic analyzes the entire file and applies intelligent compression and normalization.
Real-world test: An interview with three guests (one on a professional mic, two on laptop mics). Auphonic balanced all three so evenly that it sounded like they were in the same studio.
Pros: Good results. Simple to use. Free tier available.
Cons: Less effective with music. The algorithm sometimes over-compresses.
Who should use it: Podcasters. Audiobook creators. Anyone with inconsistent audio levels.
Comparison Table: Best Video Tools 2026
| Tool | Price | Platform | Best For |
|---|---|---|---|
| CapCut Desktop | Free | Windows, Mac, Mobile | Beginners, social media |
| DaVinci Resolve 20 | Free (Pro $395) | Windows, Mac, Linux | Professional editing, color grading |
| Runway Gen-4 | Free tier, from $15/mo | Web browser | Cloud editing, collaboration |
| Filmora 14 | $69.99/year or lifetime | Windows, Mac, Mobile | YouTube, marketing, intermediate users |
| Kdenlive | Free | Windows, Mac, Linux | Open-source, budget-friendly advanced features |
Comparison Table: Best Audio Tools 2026
| Tool | Price | Platform | Best For |
|---|---|---|---|
| Adobe Podcast | Free | Web browser | Voice cleaning |
| Descript | Free tier, from $24/mo | Windows, Mac | Text-based editing |
| Cleanvoice | Free trial, $10/mo | Web browser | Podcast post-production |
| iZotope RX 11 | $129+ | Windows, Mac | Professional audio repair |
| Krisp | Free (60 min/week), from $8/mo | Windows, Mac, Mobile | Real-time noise cancellation |
| Auphonic | Free (2 hrs/mo), from $11/mo | Web browser | Leveling, podcast optimization |
Practical Workflows That Actually Work
Workflow 1: Weekly YouTube Video Production
Step 1: Record your footage and voiceover. Use your phone or camera. Don’t stress about perfection.
Step 2: Clean your voiceover with Adobe Podcast. Upload the audio file and download the processed version.
Step 3: Edit in CapCut Desktop. Drag your video and cleaned audio onto the timeline. Add transitions, text overlays, and background music from the stock library.
Step 4: Export in 1080p at 30fps. Upload to YouTube.
Total time for a ten-minute video: about two hours from start to finish.
Workflow 2: Podcast Production (Weekly Episode)
Step 1: Record with your co-hosts. Use Zencastr or SquadCast for remote recordings—they record locally, so audio quality stays high.
Step 2: Upload the raw files to Cleanvoice. Let it process and remove silences, ums, and clicks.
Step 3: Import into Descript. Use the transcript to make final edits (remove tangents, reorder sections).
Step 4: Level audio with Auphonic. This ensures consistent volume throughout.
Step 5: Export and publish.
Total time for a forty-minute episode: about ninety minutes, down from four hours with traditional editing.
Workflow 3: Course Video Creation
Step 1: Record screen captures with OBS Studio (free) while recording your voice.
Step 2: Process audio through Krisp if you recorded in a noisy environment.
Step 3: Edit in Filmora. Use motion tracking to highlight cursor movements or important screen areas.
Step 4: Add captions using CapCut’s auto-caption feature.
Step 5: Export and upload to your course platform.
What to Look For in 2026 Tools
Export speed. Some tools take forever to render. CapCut and Filmora are fast. DaVinci Resolve is slow unless you have a powerful GPU. If you edit daily, speed matters more than features.
Cross-platform support. Can you start on your desktop and finish on your tablet? Tools like CapCut and Runway let you move between devices seamlessly.
File compatibility. Check if the tool supports your camera’s codec. Some free tools struggle with HEVC (H.265) footage. Test with a sample before committing.
Storage. Cloud-based tools like Runway need decent upload speeds. Local tools like DaVinci Resolve need hard drive space. Plan accordingly.
Community support. When you get stuck (you will), good tutorials and forums matter. CapCut, DaVinci, and Descript have active communities. Kdenlive’s community is smaller but helpful.
Mistakes I’ve Made So You Don’t Have To
Over-relying on auto-tools. Cleanvoice removed an important pause from my interview—it sounded rushed. Always review automated edits.
Ignoring audio early. I edited an entire video before fixing the audio. Had to re-edit everything. Fix audio first, always.
Not checking levels. Published a podcast episode where one guest was barely audible. Auphonic would have saved me. Use it.
Exporting too high. 4K exports take forever and consume storage. Unless you need it, export in 1080p. Most viewers won’t notice.
Skipping captions. Videos with captions get more engagement. CapCut’s auto-caption takes two minutes. There’s no excuse.
Frequently Asked Questions
Are these tools really free?
CapCut, DaVinci Resolve, Kdenlive, and Adobe Podcast are genuinely free for most features. Descript, Cleanvoice, and Runway have free tiers with limitations. Check the details before investing time.
Can I use these tools on a budget laptop?
CapCut and Kdenlive run fine on most laptops. DaVinci Resolve needs better specs—at least 16GB RAM and a dedicated graphics card. For low-powered machines, stick to cloud-based tools like Runway.
Which tool is best for complete beginners?
CapCut Desktop. The interface is simple, the features are modern, and there are countless tutorials online. You can be editing within ten minutes of downloading.
How do I remove background noise from my recordings?
Adobe Podcast works best for voice. For music or complex audio, try iZotope RX (paid) or Audacity’s noise reduction (free, but less effective).
Is Descript better than traditional editing software?
For spoken content (podcasts, interviews, tutorials), yes. For cinematic videos with effects and transitions, no. Use the right tool for the job.
Can I edit video on my phone with these tools?
CapCut has excellent mobile apps. Filmora and Kdenlive also offer mobile versions. Runway works in your phone’s browser. Desktop tools stay on desktop.
How much should I spend on paid tools?
Start free. If you produce content regularly, consider Filmora ($70/year) or Descript ($24/month). They pay for themselves in saved time. For professionals, DaVinci Resolve Studio ($395 one-time) is worth every penny.
Do I need an external microphone?
Yes. The best audio processing can’t fix everything. A $30 USB microphone improves recordings dramatically over built-in laptop mics. Samson Q2U and Blue Snowball are reliable budget options.
Why do my exports look worse than the original?
Check your export settings. Match framerate and resolution to your source footage. Use a higher bitrate (10-20 Mbps for 1080p). Low bitrate causes compression artifacts.
How do I collaborate with others using these tools?
Runway has native collaboration. Descript allows shared projects. For free options, use CapCut and share project files via cloud storage. Or edit in DaVinci Resolve and share the project folder through Dropbox.
Conclsion
The best video and audio tools in 2026 don’t require a degree in media production. They’re accessible, affordable, and surprisingly powerful. Whether you’re publishing your first YouTube video, starting a podcast, or creating online courses, there’s a tool that fits your skill level and budget.
Start with CapCut for video and Adobe Podcast for audio. Both are free and produce excellent results. As you grow, experiment with DaVinci Resolve and Descript. They’ll unlock professional-level possibilities.
Remember, tools are just tools. The best software in the world won’t fix poor lighting, shaky cameras, or bad speaking habits. Invest time in basics—good microphones, decent lighting, and clear delivery. Then let these tools polish your work to professional standards.
I’ve produced over a hundred videos and fifty podcast episodes using these tools. Each one was better than the last. Yours will be too.
Have you tried any of these tools? Found a hidden gem I missed? Send me a message or drop a comment. I’m always testing new applications and updating recommendations. Good luck with your projects.